How To Sew An Invisible Zipper | DIY Tutorial
Oh, to sew an invisible zipper.
It looks so good, yet can be so intimidating!
As if a regular zipper wasn’t hard enough to sew, right?
I struggled for a while when I first started trying to get my invisible zippers to truly be invisible and getting the fabric after the zipper to lay flat.
So frustrating!
But finally, after reading & watching a gazillion tutorials…..I finally looked at the insert that comes inside the invisible zipper package (at least it does with Coat’s brand of zippers).
Low & behold, they have instructions! After feeling like an idiot for not looking at this sooner I decided to try it their way.
Sidenote: The pictures that came with the instructions can be a wee bit confusing so that is why I wanted to share this tutorial.
For some reason, I was able to take these instructions & make it work. Oh, & I finally bought an invisible zipper foot. These two things instantly upped my invisible zipper game.
Without further adieu, let’s learn how to sew an invisible zipper!

Step #1: Gather your supplies
You’ll Need
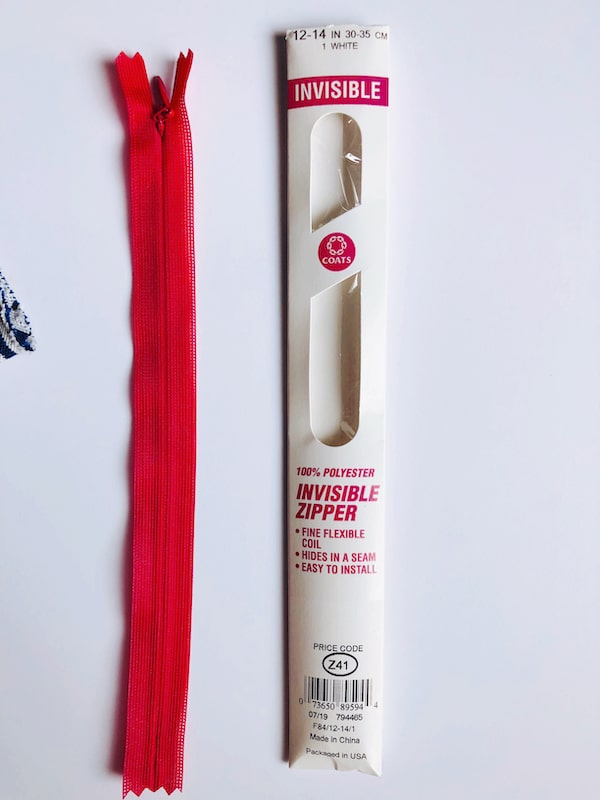
- Invisible zipper – I like the Coats brand
- Fabric – if you are doing this for the first time try to avoid fabrics that are thin, slippery, or super stretchy
- Invisible zipper foot – I got mine off amazon
- Pins or quilt clips
- Matching thread
- Sewing machine
- Scissors
I like the Coats Invisible zippers as they sew up very nicely but you can use any kind. The zipper I use here actually isn’t a Coats brand zipper but it’s the only one I have that gives a good contrast to help you see what is going on.
Ok, so you have your zipper & your fabric, great.
I would HIGHLY recommend getting an invisible zipper foot. It will make your life so.much.easier.
Like, you don’t even know.
I use this one & it does a great job. I think it’s a generic one that will work with most machines. I have a Singer Heavy Duty & it works great with mine.
They also have some at Joanns that are plastic but I haven’t heard great things about them.
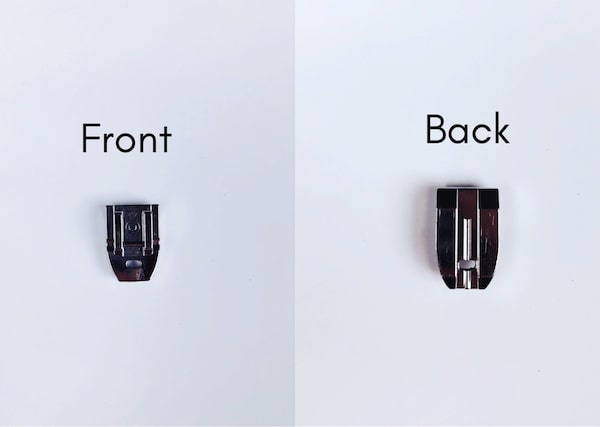
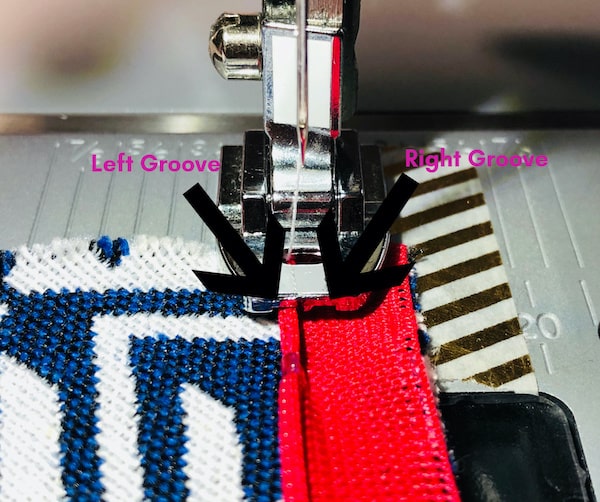
The invisible zipper foot has a hole in the top for the needle to go through and then two grooves on the bottom.
You’ll put the zipper coil for whichever side you are sewing into the corresponding groove and then start sewing.
These grooves are magical devices that keep your needle RIGHT NEXT to the coils. Genius I tell you.
Step #2 Iron Your Zipper
This may seem weird, like why in the world would I need to iron my zipper?
Well, the premise of an invisible zipper is that….it’s invisible.
In order to make that happen, you need to sew the fabric SUPER CLOSE to the zipper coils. And in order to do THAT, you need to iron the zipper coils flat.
Make sense?
They don’t have to be PERFECTLY flat but you want to clearly see the two rows of stitching on the underside. I attempted to photograph this to show you and…..well, it’s not a great photo.

In my defense, those two rows of stitching are teeny tiny & the same color as the zipper. I had to hold it up to the light & squint to see them! What the heck. Maybe it’s cuz I’m getting old, who knows.
Anywho!
You just want it to be flattened enough that your invisible zipper foot can do its job.
Now, be SUPER CAREFUL when doing this. Your iron needs to be on a synthetic setting because you DO NOT want to melt the coils.
Your zipper would cease to zip if that happens & then you are S.O.L. & that is NOT GOOD.
So, to save yourself lots of headaches, put your iron on a low setting and very, very carefully iron the coils flat, k?
Step #3: Pin Right Side of the zipper onto the fabric
Ok, IMHO this part is the hardest/most confusing. At least, it was for me. But once you can wrap your brain around this weird spatial math problem, you can do this easy peasy.
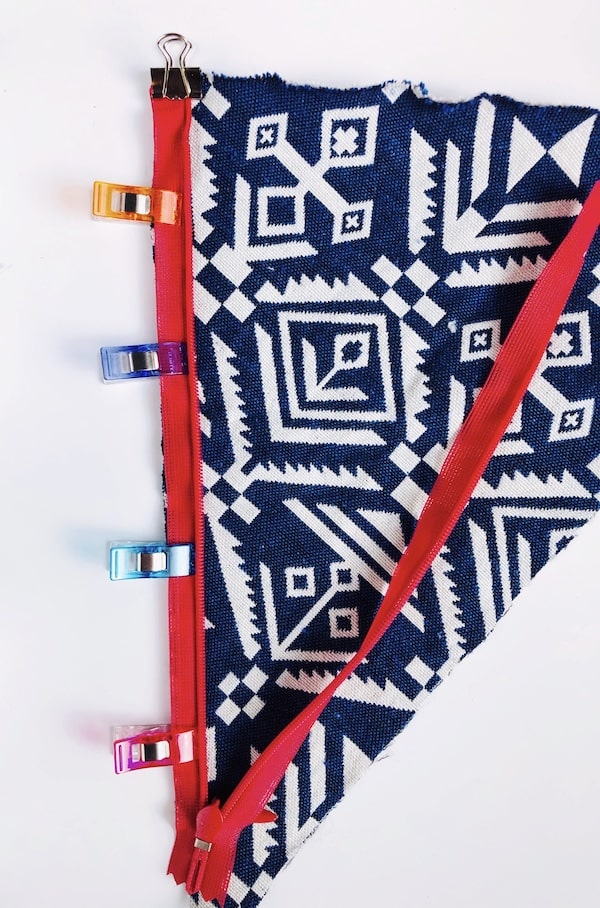
Lay your fabric down with the right side up (the “right” side means the side that everyone will see when the garment is finished).
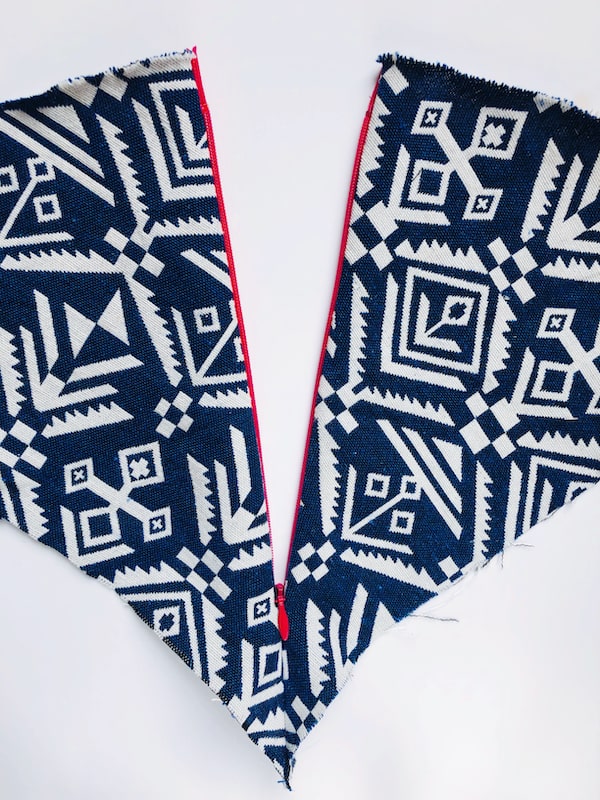
Place your zipper right side up, between the two pieces you are sewing it into. (Weird sentence). Then, unzip your zipper. It should look like the photo below.

Now, flip your zipper over so you are looking at the WRONG SIDE.
Then, scoot (technical word) your zipper over until the left side is lined up with the edge of the right side of the garment. Pin or use quilt clips to keep it in place. See the picture below.
Side note: I usually use a 1/4″ – 3/8″ seam allowance, which is why I put the edge of the zipper right up to the side of the fabric. If you are using a pattern, your seam allowance is typically 5/8″ so you’ll want to measure that and then place your zipper accordingly.
Side note #2: The same goes for where to place the top zipper. You’ll want to place it so the top of the zipper stop is right at your seam allowance. So if your seam allowance is 5/8″ then place your zipper so the zipper stop is 5/8″ below the top of your fabric.
Still with me?
You’re doing great! I know this can be overwhelming and frustrating when you are new to sewing but just keep going I promise you’ll keep getting better. You got this!
Step #4: Sew Left Side Of Zipper
Ready to see why the heck you need an invisible zipper foot?!?
Because it’s magical.
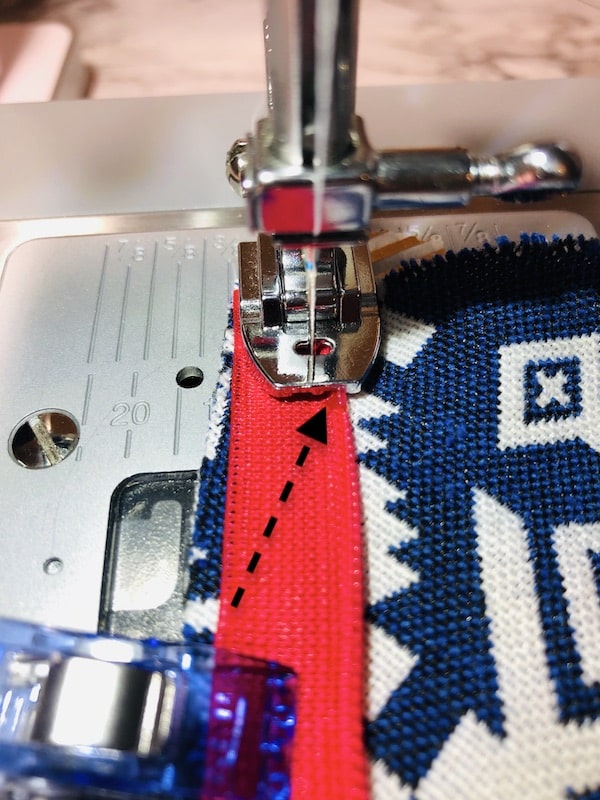
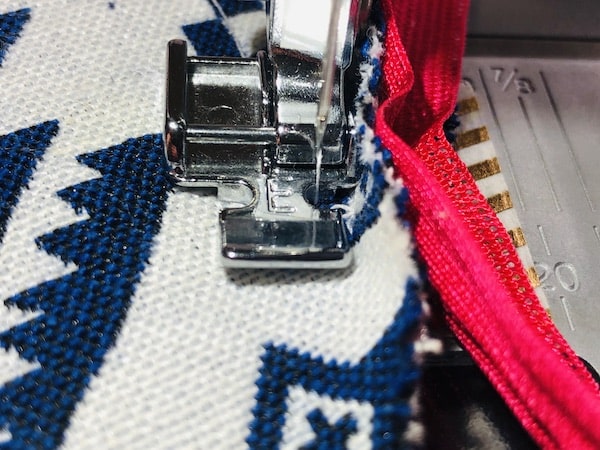
Place your zipper/fabric onto the sewing machine and line it up so the zipper teeth (coils) fit into the right slot on the zipper foot.
It should fit great and then your needle will magically be placed SUPER UBER CLOSE to the zipper coils!!
How cool is that? Aren’t you so glad I told you about the invisible zipper foot?
You’re welcome 😘
Now, using a 2.5 length stitch, SLOWLY start to sew down the length of your zipper, backstitching at the top & bottom, until you reach the zipper pull.
I say slowly because you want to make sure your zipper coils stay in the groove.
Ironing your zipper in the first step makes this step a bit easier but you still need to keep a close eye on it because it can pop out of the groove pretty easily.
It’s not perfect, k?
Just don’t sew over your zipper coils. That will make zipping it up a wee bit difficult.
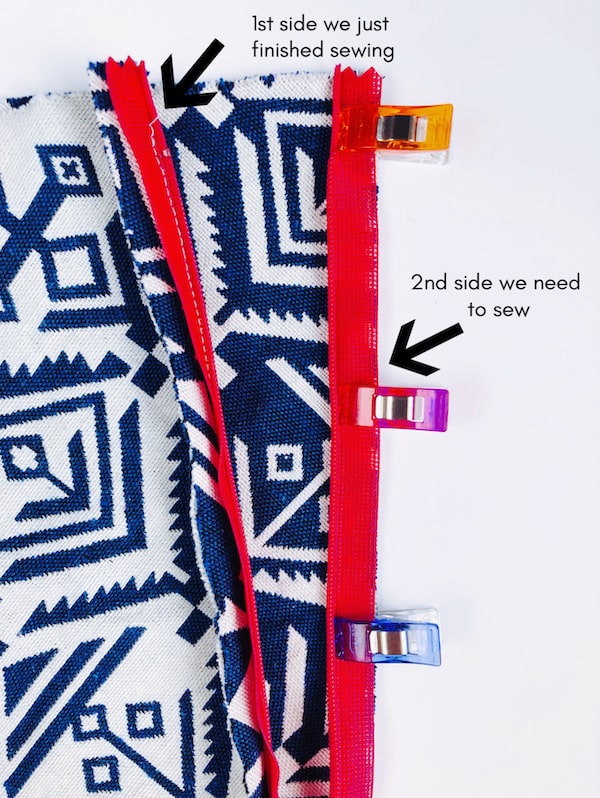
Step #5: Sew Right Side of Zipper onto Left Side of Fabric
You are halfway done sewing your invisible zipper! Woohoo!
But before we do our happy dance, we need to sew the other side.
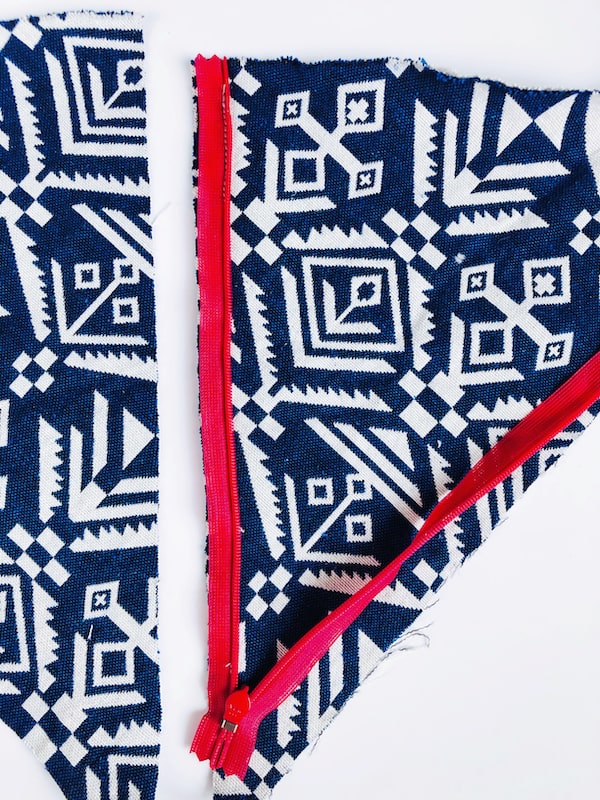
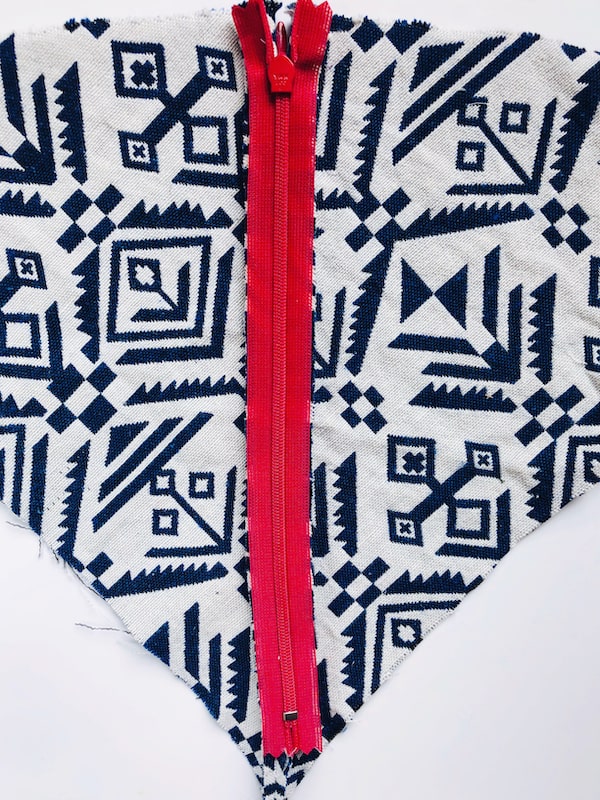
Turn your zipper over so you are looking at the right side again & zip it up.
It should look like the photo below
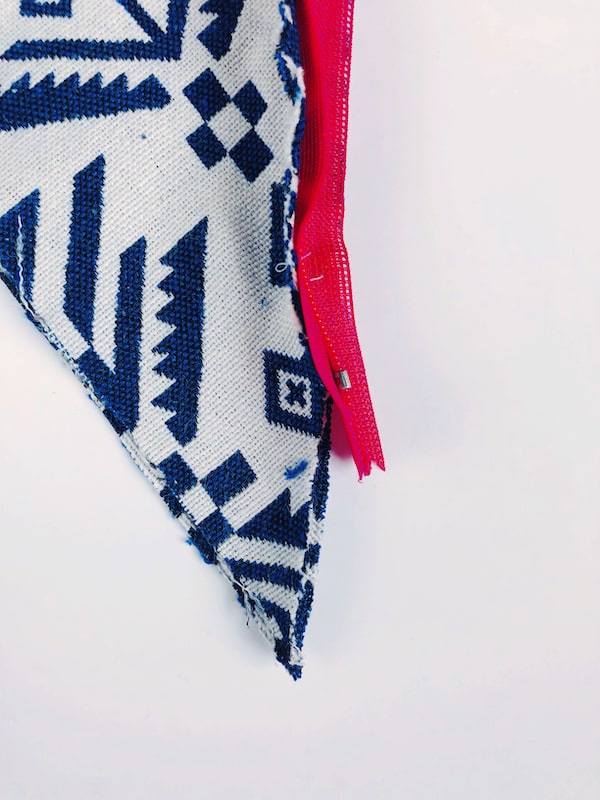
Now, flip the zipper over AGAIN so that the right side of the zipper & the fabric attached to it are facing the second piece of fabric.
You’ll pin or clip it to the edge (or seam allowance) & then unzip it OR you can unzip it first if that is easier. It should look like this when you are done:
Once you are pinned and ready to go you’ll take it to your sewing machine & place it so the zipper coils go through the left side of the groove in the invisible zipper foot.
Sew down along the zipper coils just like before, stopping when the zipper foot touches the slider; backstitch.
Phew! Can we just celebrate how much you’ve done so far?! I’m so proud of you for sticking with it!
We just have a little bit more to do and then you will have a perfectly installed invisible zipper!
Step #6: Finish Sewing The Rest Of The Seam
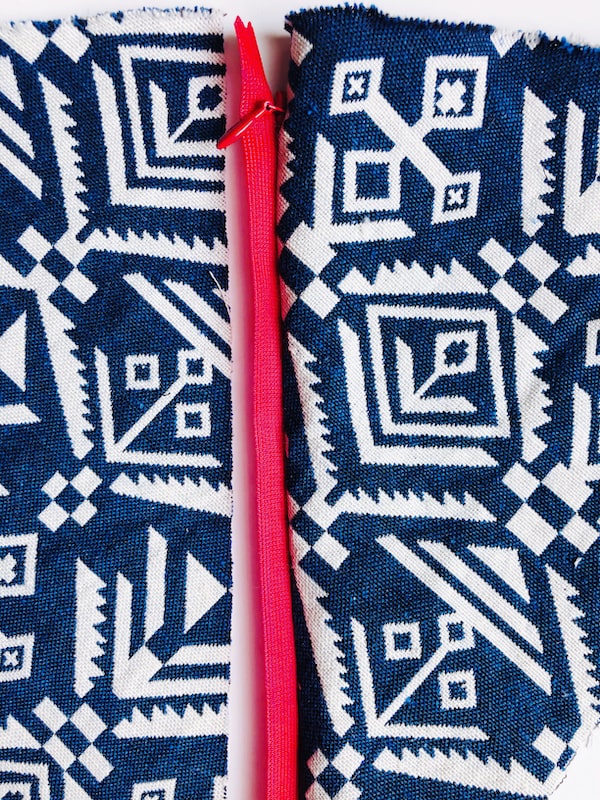
Lay your fabric out flat right side up and zip up your zipper. At this point, it should look fabulous!
Side note: Don’t you just love how the zipper disappears into the fabric? I guess that’s why they call them invisible zippers, right?
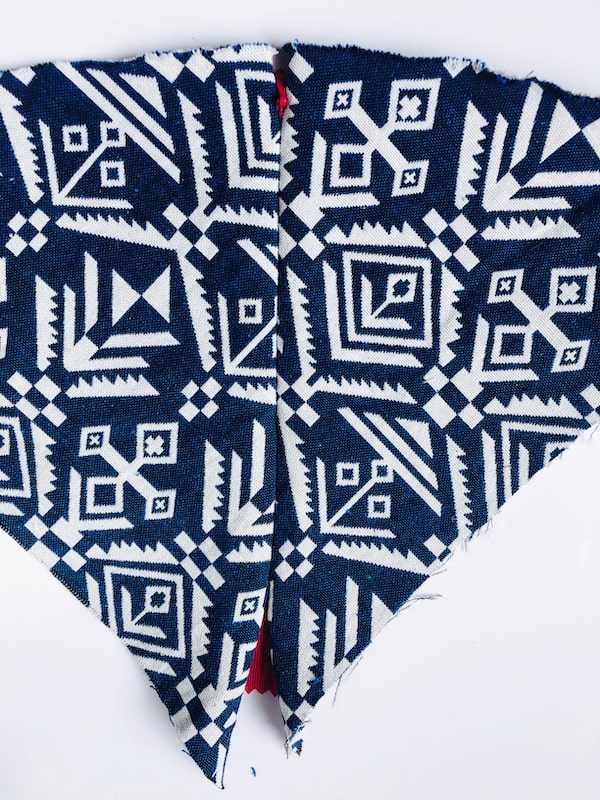
Well, we still need to do the bottom part…we have to finish the rest of the seam! Unless of course, you are going for the “showing my underwear is cool” look. You do you, girl.
To finish the rest of the seam fold your fabric right sides together so the zipper is sticking out the side.
Take your invisible zipper foot off of your machine & replace it with your regular zipper foot.
Attach the foot so the needle is going through the right side and position your fabric so the needle is as close as possible to the stitching we just completed.
At this point, you can either sew the rest of the seam with the zipper foot or you can sew about 2″ and then switch to your regular presser foot.
The goal is to get as close to the first stitching lines as possible so it will create a smooth transition from the end of the zipper to the rest of the seam.
You don’t want weird pucker things happening around the booty, ya know? Here’s what it should look like once you’ve finished the seam:
Looking good!
Step #7: Tack Zipper Ends To Seam Allowance
This last step is optional, technically you don’t have to do this but it is helpful especially when you have thinner fabric.
The ends of the zipper below the stop are not sewn to anything so they can often move independently of the fabric.
You can prevent this by stitching each side down just to the seam allowance (you don’t want this to show through on the front of your fabric).
Folding the fabric right sides together might be better so you can access the zipper and the seam allowance without the rest of the fabric getting in the way.
It’s a good idea to hand stitch this the first time you do it so you don’t accidentally stitch through the main fabric. Just a couple of stitches on each side should hold it in place so it doesn’t stick out weird in the back.
Conclusion: How To Sew An Invisible Zipper | DIY Tutorial
Boom! You did it! 💃
You have now officially inserted an invisible zipper! YAY! I knew you could do it!
Once you can visually see in your mind how to flip it to get it to attach properly, it all starts to make sense.
Also, did I mention that having an invisible zipper foot is SUPER HELPFUL?! 😜
I am so proud of you for sticking with it. Let me know how yours turned out in the comments.
I believe in you!
Until next time beautiful,